Draw Floor Plans Yourself
Easily create professional-quality floor plans. No outsourcing. No CAD skills needed.
Draw a Floor Plan with RoomSketcher: Step-by-Step
Follow this guide to draw your first floor plan. Before you start:
- Choose an area or building to draw
- Take measurements
Watch the video to learn how to draw or follow the instructions below.

Step 1: Download the RoomSketcher app
Download the app to your Windows or Mac computer, or use it on your iPad or Android tablet.
- Works offline
- Cross-device syncing
- Save and edit projects anytime
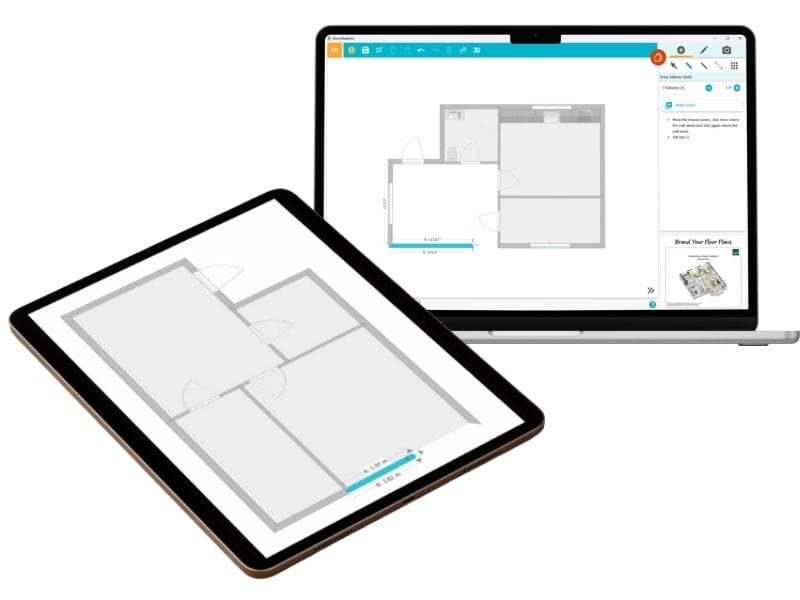
Step 2: Create a Project And Start Drawing
Open the app and click Create New Project to start from scratch or select a template if you have a common layout type. Then, use the simple drag-and-drop tools to draw walls and define your layout. Add doors, windows, and other fixed installations.
- You can click and drag walls to reshape them at any time
- Use the measurement on the walls to keep things precise. You can also type in the exact wall length
- Drag your windows and doors onto the walls and see them snap into place. Adjust the size and flip them as you see fit
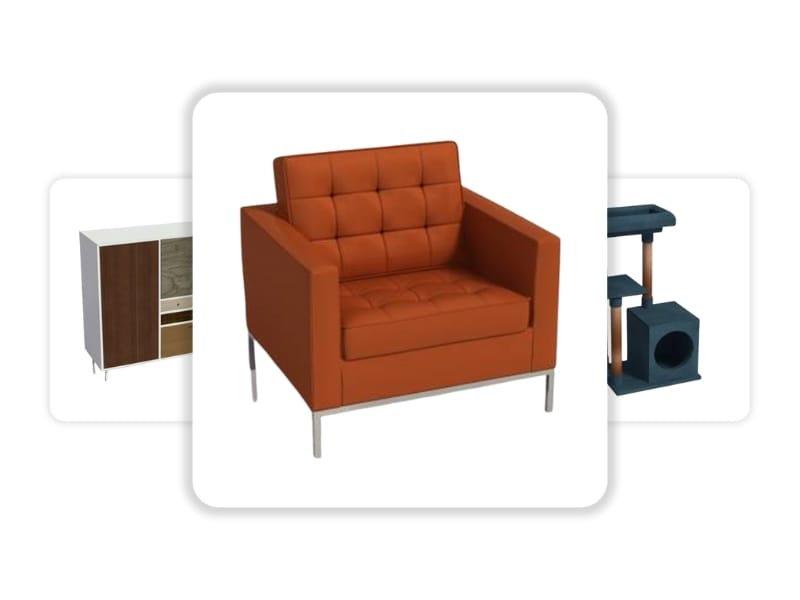
Step 3: Add Furnishing And Decorate
Customize with a wide range of fixtures, furniture, and materials. Click the Furniture tab and browse by room type or search for a specific item. Drag and drop furniture onto the canvas to place it.
- Easily resize, rotate, and duplicate furniture items
- Use core furniture that looks good in 2D & 3D every time
- Look up and use branded furniture
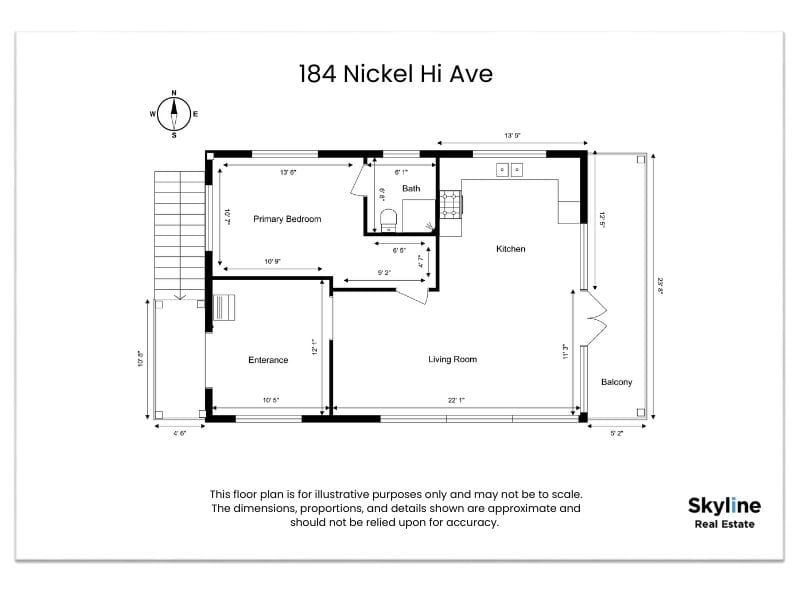
Step 4: Generate Floor Plans
Once you're finished with your layout, generate high-quality floor plans. This feature is only available for paid users.
In your project:
- Open the menu and choose 2D Floor Plans or 3D Floor Plans
- Click on Generate 2D Floor Plan or Generate 3D Floor Plan
- Tip: Click on Preview before generating to see what the plans will look like
Step 5: Download And Print
Once your floor plan is generated, you can download and print it. These features are only available for paid users.
- Go to 2D Floor Plan or 3D Floor Plan from the menu
- Click Print to print a letterhead or web image
- Click Save to Disk to download your plan as a JPG, PNG, or PDF
Free to Start. Easy to Scale.
You can draw complete floor plans, furnish, and take 3D Snapshots at no cost. As your needs grow, upgrade to:
- Generate, download, and print high-quality floor plans
- Order floor plans at a discount
- Get an expanded furniture library and use Replace Materials
- Use advanced measurements and total area
- Take 3D Photos, 360 Views, and use Live 3D
Start From a Template
RoomSketcher offers a wide range of ready-to-edit floor plan templates to help you get started faster. Choose from popular layouts for homes, offices, kitchens, and more. Click on the image to open the project in your app.


